Design
Fine wire
and small joint surfaces
Dissimilar
metals welded directly
Milliseconds
per weld
68 pairs
in the lab weld-schedule database
Three different materials, aluminum, nickel and copper, welded and arranged into a stick figure, with the Percussion Welder tagline "Change what's possible."
Lab data
Every material pair we have tested
33 materials, 68 pairs, 131 lab schedules. Hover or tap a material to see what it has been welded to.
Explore
Copper, nickel, tungsten and aluminum have the most lab schedules. Select any material to light up the pairs it has been welded to.
Each line is at least one lab schedule. Schedules are starting points, not guarantees: validate on your own parts.
The fix
Offset the parts so the high point is supported
A square, burr-free cut is always preferred. If an angled cut cannot be avoided, shift the parts before welding so the high point lands inside the opposing edge.
Direct centerline alignment
The high point of the uneven end is at or beyond the edge of the opposing part. When weld force is applied, the contact geometry encourages the wire or pin to skid sideways.
Slide the offset until the green dot sits inside the wire. Then verify the fixture position with sample welds before production.
Schematic, not to scale. After MTI's pin/wire welding practice aid.
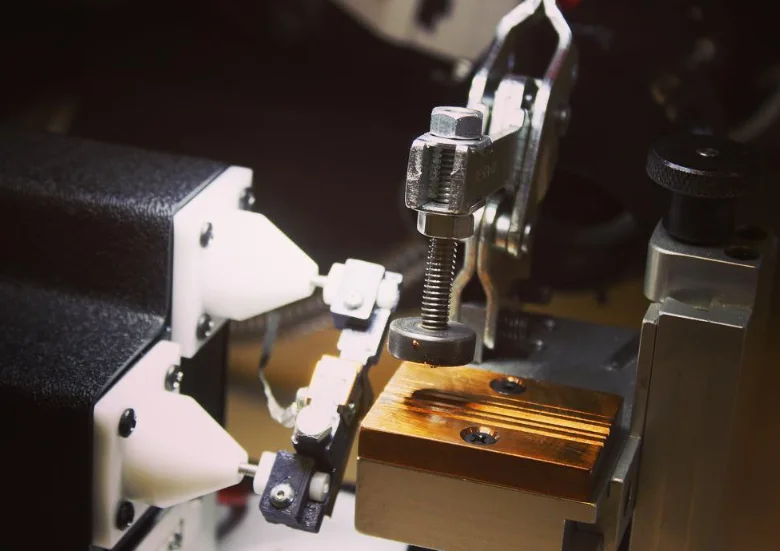 Cones, clamp and copper block
Chapter 01 / 07
Designs percussion welding suits
The increasing complexity of product designs has led to interest in percussion welding, which allows intricate welds in milliseconds. It handles delicate designs with fine wires and small joint surfaces, and it gives engineers and designers more options because it joins metal combinations that are difficult to weld.
It is used for sensors, electronics, lighting, heating elements, batteries, medical devices and automotive equipment. In these designs the weld is usually a lead, pin or terminal, and the surrounding parts, insulation or plating cannot take much heat.
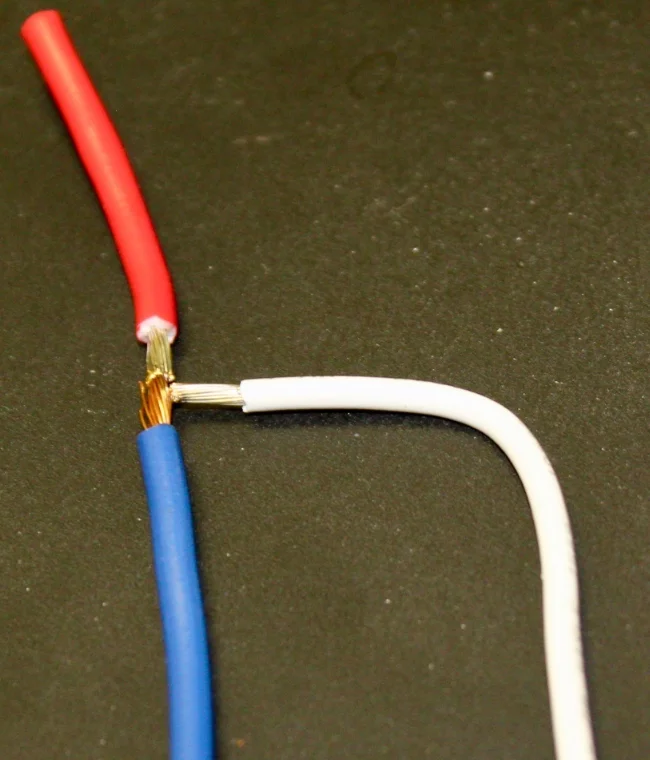 Three-wire junction up close
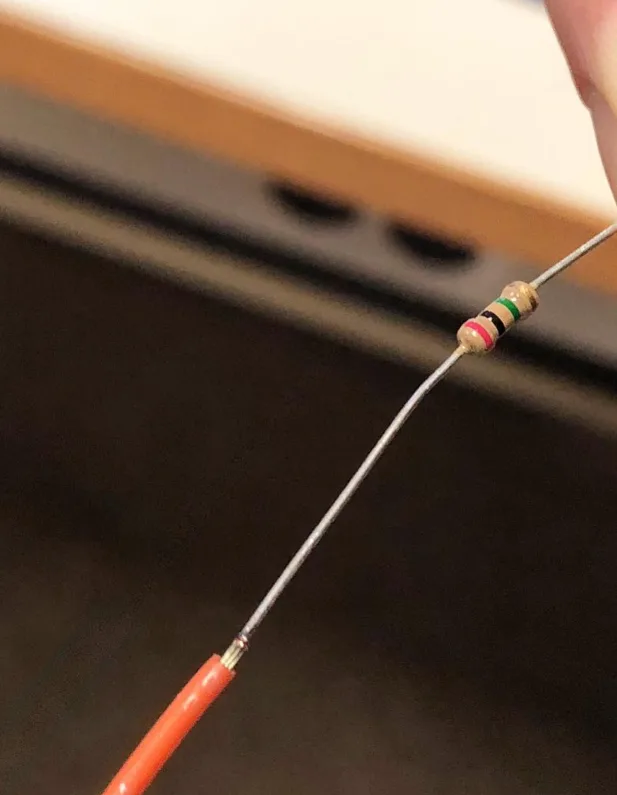 Insulated wire welded to a bare lead
Chapter 02 / 07
Choose the material pair early
The material pair is the first design decision that affects the weld. Percussion welding joins dissimilar metals directly, but each pair needs its own settings, and a few pairs need testing before anyone can say more.
Our lab database covers 33 materials and 68 material pairs in 131 schedules. Use the material compatibility checker to see whether your pair is in it, and the weld schedules table for the settings. If it is not, send the materials for a free applications test.
Read more in the guide to dissimilar metal welding.
Want to see it on your parts?
Send samples and we'll run test welds before you commit.
Gallery
Small joints, close up
Joints designed for percussion welding, from our bench.

Chapter 03 / 07
Joint types we weld on the bench
These are joints we have welded and recorded in our lab, so they are a useful starting vocabulary when you sketch a design:
- Wire to a flat strip.
- Wire end to wire end (butt joint).
- Wire to a tube.
- A screw to a washer.
- Wire to a disk, including stranded copper wire to aluminum.
- Several wires joined at one junction.
- Thermocouple wires welded at the bottom of a drilled hole.
Each joint is two surfaces brought to a gap, so the geometry has to let one part approach the other cleanly. Tell us the shapes and sizes and we will say what we expect before you build parts.
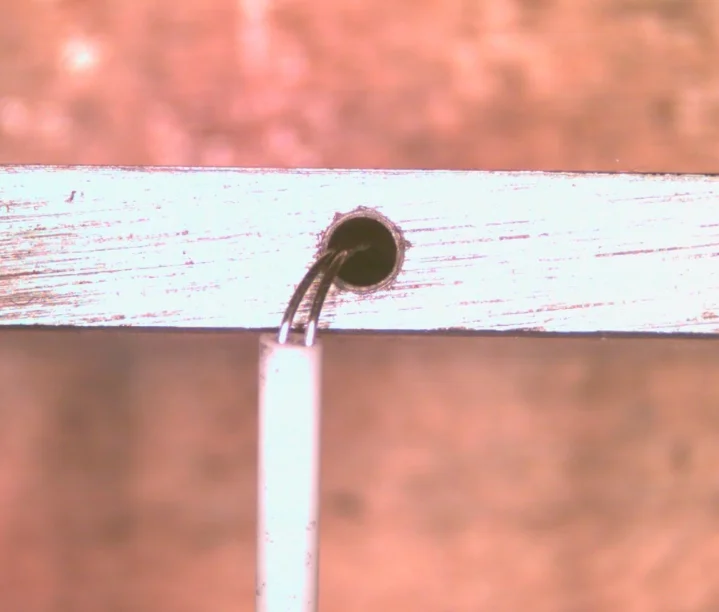 Type K thermocouple wires welded at the bottom of a 1/16" hole in a stainless steel plate
Chapter 04 / 07
Holding and aligning the parts
In a percussion weld the two parts must be held with their weld points at a pre-defined gap and brought together squarely. The design has to leave a way to do that.
The 726 Bench Fixture holds the wire in a moveable wireholder with a spring-loaded thrust, and the workpiece in a stationary workpiece holder. It has Z-axis and Y-axis adjustment, a gap adjustment and an initiation lever, and a foot pedal or hand switch triggers the weld.
For parts that do not fit the standard holders, we review part geometry, joint design and fixturing strategy with your team before you cut metal.
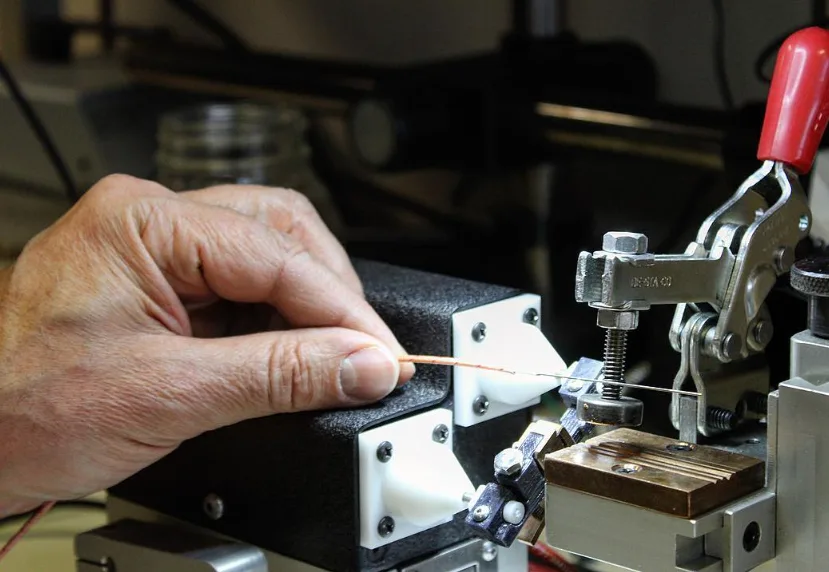 Loading a wire into the fixture
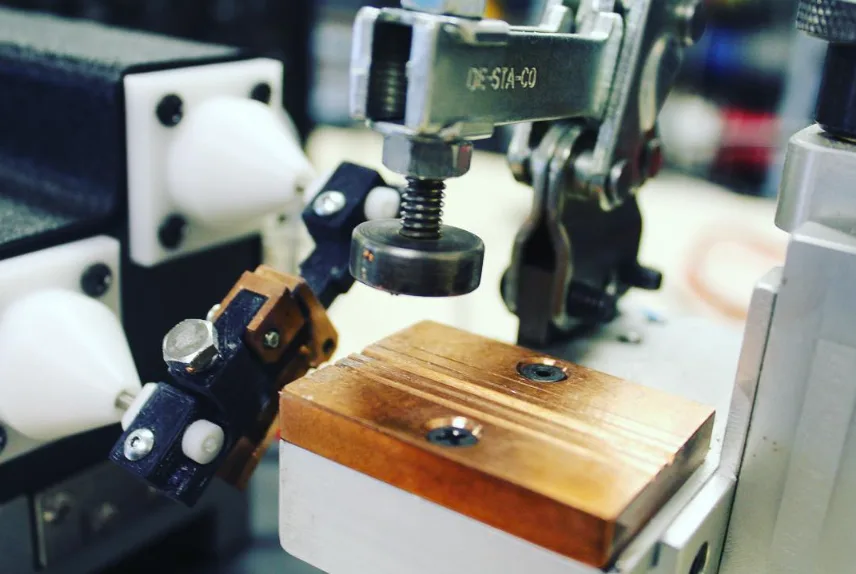 The 726 fixture up close
Chapter 05 / 07
Setting the parameters
A weld is defined by a small set of parameters. Our lab schedules record them for each material pair:
- Wire diameter.
- Actuator velocity.
- Delay time.
- Capacitance setting.
- Weld voltage.
- Pulse, long or short.
On the 858 these map to the front-panel dials and switches. Use the Parameter Finder to get a starting set for your pair and wire size, then change one setting at a time. Schedules are starting points, not guarantees, and every application is validated on your own parts.
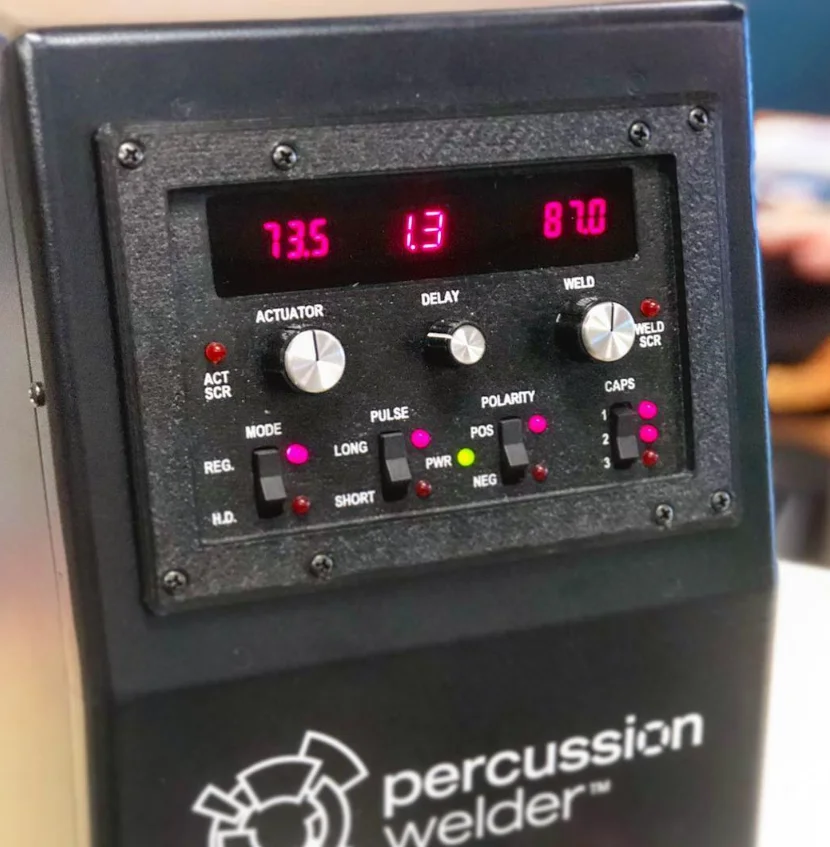 The 858 front panel
Want to see it on your parts?
Send samples and we'll run test welds before you commit.
Chapter 06 / 07
Verifying the joint
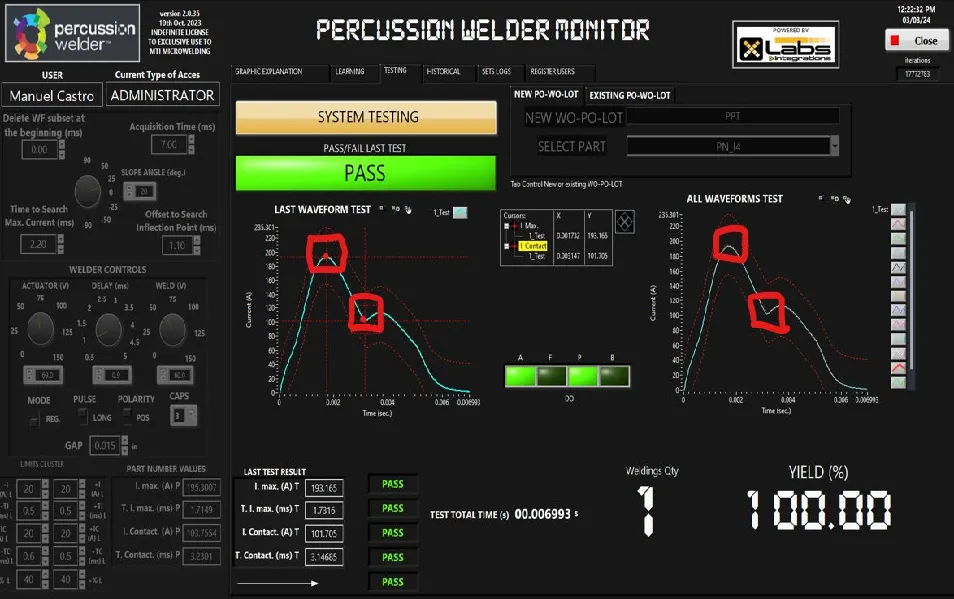
Decide at design time how the weld will be checked. Welds are inspected visually, by mechanical testing, or with the Percussion Weld Monitor.
A pull test is the simplest mechanical test. In pull tests the wire often breaks before the weld. The monitor adds a record of every weld: it learns a signature waveform from good welds and shows Pass or Fail for later ones, which gives you documentation for production.
State your strength, resistance and appearance requirements in the specification, and we will test against them.
Chapter 07 / 07
From prototype to production
A design that works on the bench can go to production without a change of process. The same four-stage weld is used from the first prototype to the production line.
- Prototype: evaluate the application, then a process evaluation with free applications tests of your materials.
- Development: usually in your environment, or at MTI MicroWelding if you prefer.
- Production: operator training, weld parameter documentation, and integration into automated lines where needed.
See process development for the stages in full, and talk to us early: a joint designed for percussion welding is easier to weld than one adapted afterward.
Where to next
Wire Joining Welding
Butt weld wire to wire, wire to pin or pin to pin with a percussion welder, including dissimilar metals and stranded to solid wire, with a minimal HAZ.
Open →Material compatibility checker
Open →Process Development
From application review to process evaluation to process development, usually in your own facility. Free applications tests of your materials are available.
Open →726 Bench Fixture
The Model 726 Bench Fixture is the weld head of the Percussion Welder system: it holds, aligns and thrusts small parts together, with the 858 and 808.
Open →FAQ
What kinds of designs suit percussion welding?
Fine wires and small joint surfaces, delicate parts, and joints between dissimilar metals. It is used in electronics, sensors, lighting, heating elements, batteries, medical devices and automotive equipment.
Can I join two different metals in my design?
Yes. Percussion welding joins dissimilar metals directly, with no filler. Check your pair in the material compatibility checker, or send us the materials for a free applications test.
What joint shapes have you welded?
On our bench we have welded wire to a flat strip, wire end to wire end, wire to a tube, a screw to a washer, wire to a disk, several wires at one junction, and thermocouple wires at the bottom of a drilled hole.
Do I need to design a fixture?
The 726 Bench Fixture holds the wire and the workpiece, with adjustment for position and gap. For other geometries we can review part geometry, joint design and fixturing before you cut metal.
How do I know my design will work?
Test it. The process evaluation checks on your own materials whether the weld specification can be achieved. Our lab schedules are starting points, not guarantees.
Can a design be welded in volume?
Yes. Percussion welding can be integrated into automated production lines, and the Percussion Weld Monitor supports production monitoring.
Still have a question? Tell us your weld challenge and an engineer will reply.
Start here
Send a print, a sample or a description of the joint. Free applications tests of your materials are available, and we can run live, in-person tests at our lab in Denver. Call 303-536-7838 or email sales@percussionwelder.com.
Prefer to talk? Book a demo or call 303-536-7838