
Equipment
3
weld characteristics checked: max current, inflection or contact point, waveform
Pass / Fail
screen plus digital output signal
3 stages
learn, configure, test
Optional
add-on to the 858 system
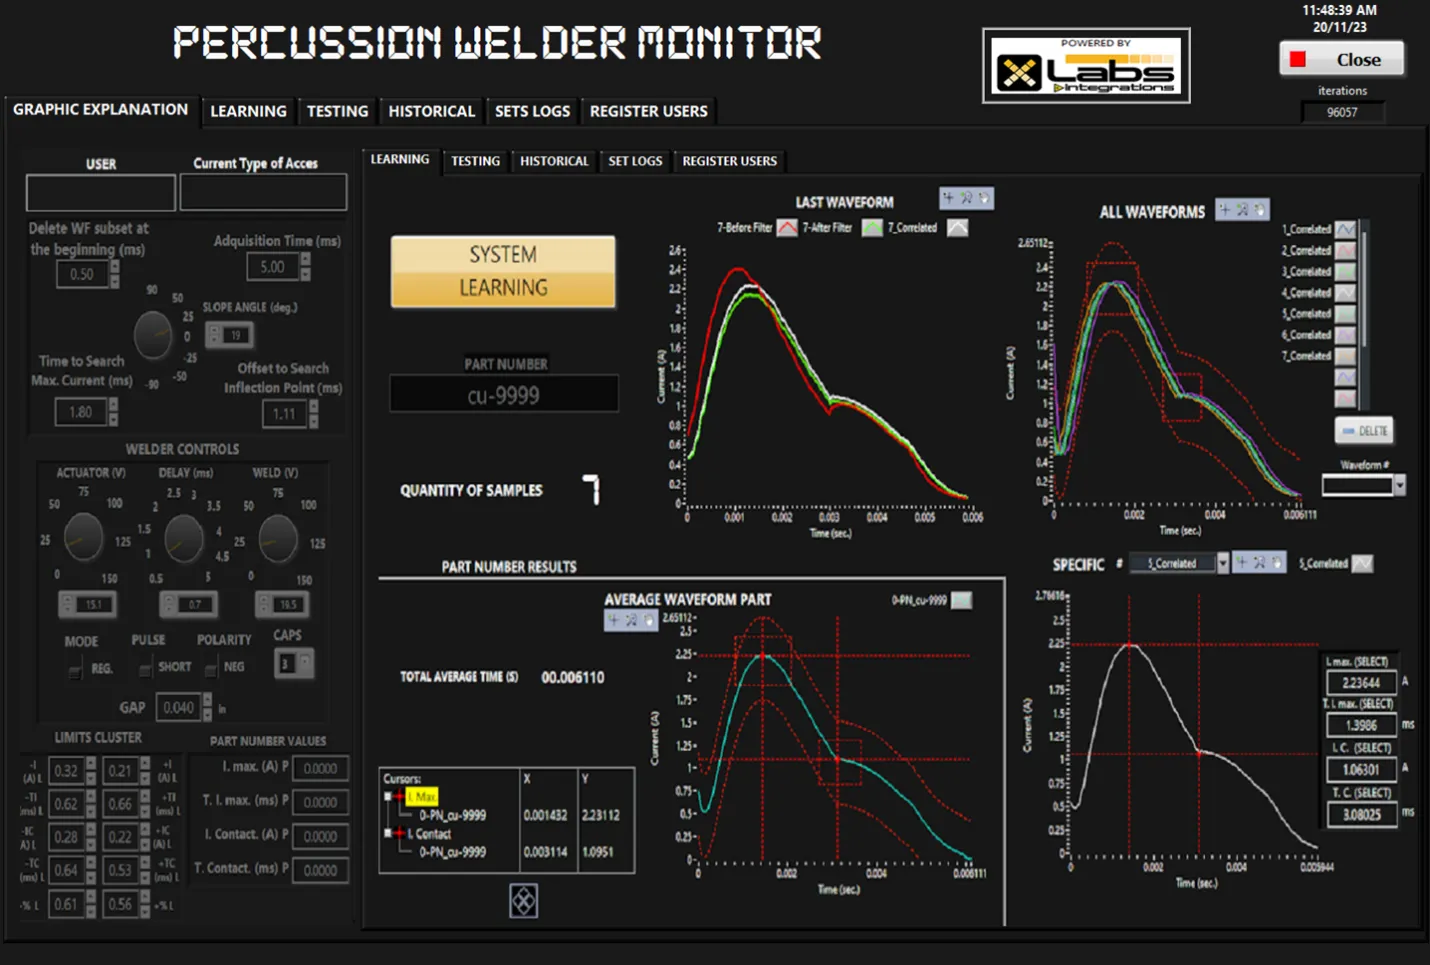
The Percussion Weld Monitor by MTI MicroWelding provides waveform analysis to aid in the development of weld settings, define a “Signature” waveform for any particular product, evaluate production welds, and collect data to meet your QC requirements.
There are 3 primary stages for setting up and monitoring your percussion welds on the weld monitor.
Follow these Key steps or contact us for the entire operating manual.
Chapter 01 / 02
Learning/Development
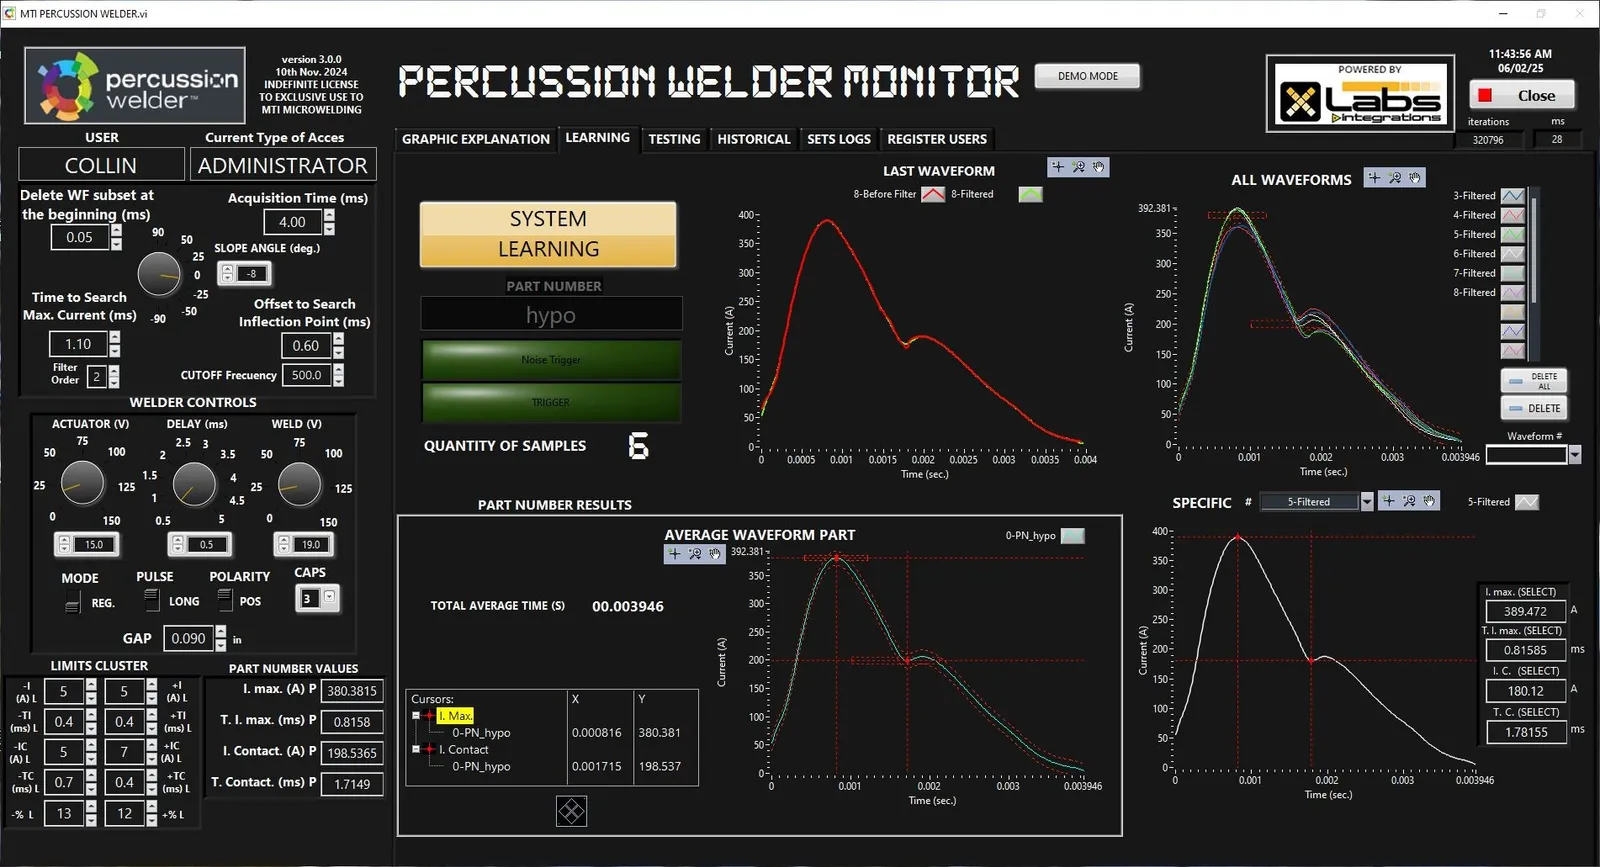
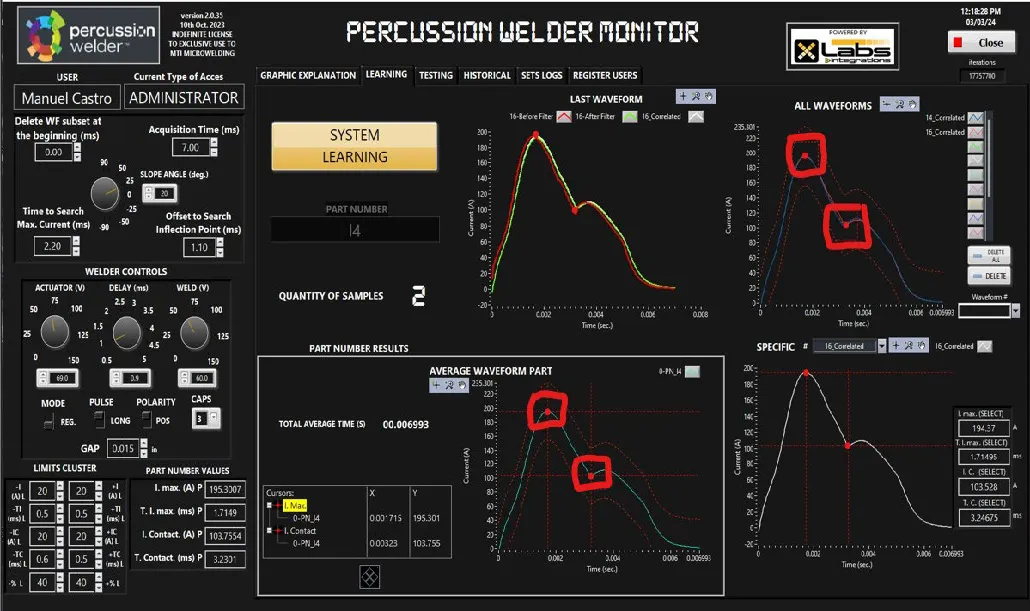
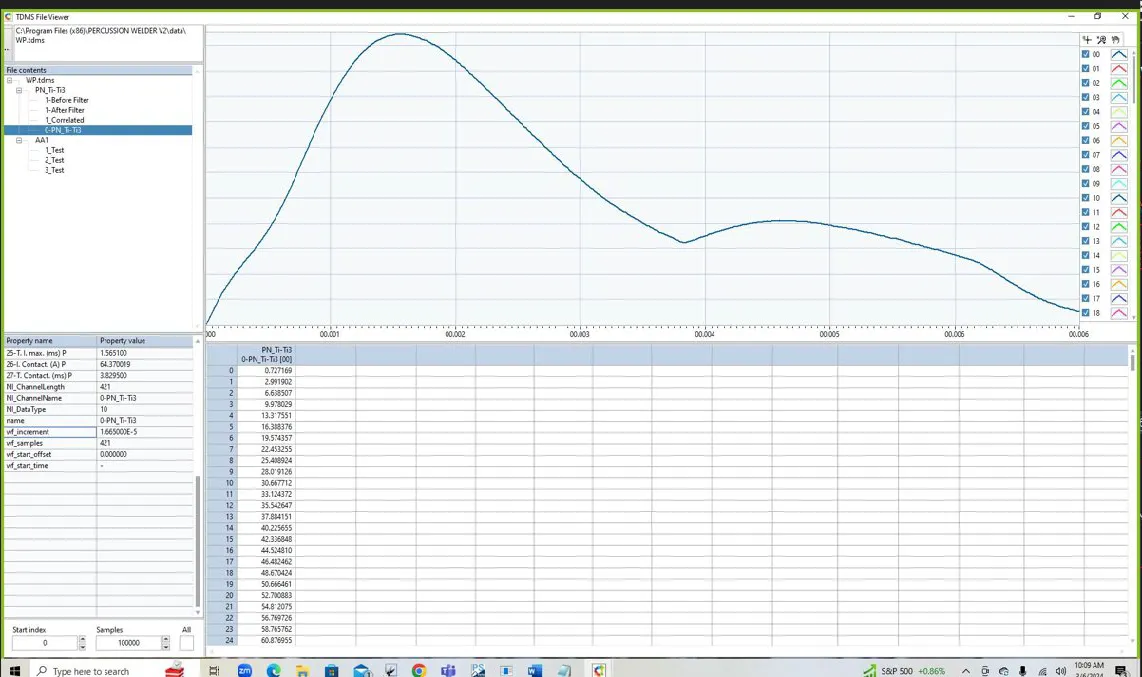
In the ” Learning” stage using the weld monitor, we perform welds to create a signature waveform for evaluating production welds.
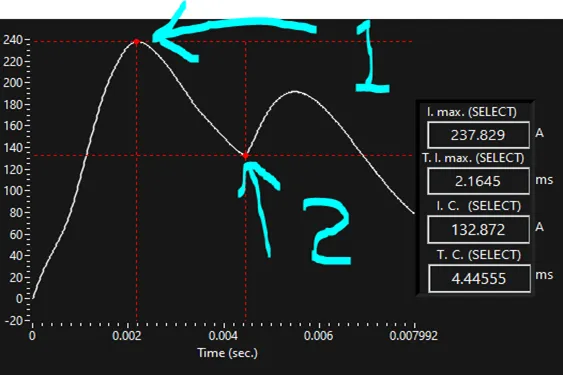
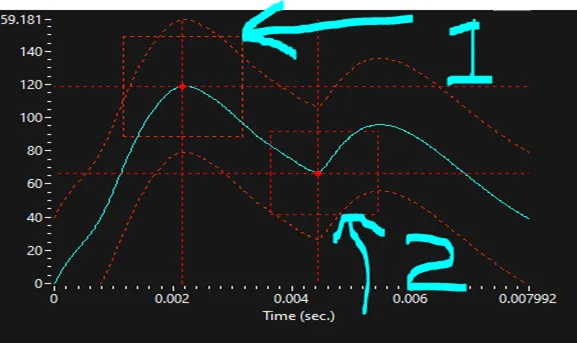
The system weld monitors three main characteristics of the percussion weld energy output. In the Learning stage, the search area for each of these characteristics is configured:
(Maximum Amplitude)
(Point of Contact or Inflection)
(Waveform)
Testing/Monitoring
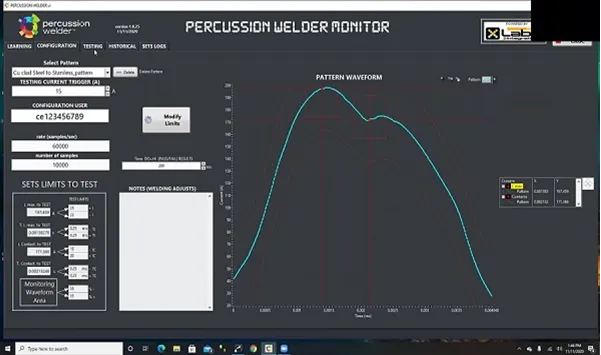
Once the pattern is created you can continue to the next configuration step on the percussion weld monitor and use this in the next step to test. In the Configuration step, you select the pattern for Testing and make any desired adjustments to the search areas. You can also set the duration time of the digital output signals of a pass or fail for alarms or automation. This will help finalize details using the weld monitor. To understand these processes see the bench fixture as well.
| SPECIFICATIONS | |
|---|---|
| AC Input: | 110-120 VAC, 60 Hz, 20 amp peak 200-220 VAC, 50-60 Hz, 10 amp peak |
| Circuit Protection: | 10 amp or 20 amp fuse (see AC input above) |
| Capacitance: | Regular: - Bank 1: 330 µF - Bank 2: 1,830 µF - Bank 3: 8,430 µF Heavy Duty: - Bank 1: 10,230 µF - Bank 2: 11,730 µF - Bank 3: 18,330 µF |
| Bank Voltage Range: | 0-150V |
| Repetition Rate: | |
| Timing Delay: | 0.5 to 5.0 milliseconds |
| Triggering: | Closed contact 15V |
| Polarity: | Positive or Negative (User Selectable) |
| Actuator Energy: | 0 to 30 Joules into 0.6 ohms |
| Actuator Speed: | 0-33 inches per second (0-150V) |
| Cooling: | Fan forced air |
| Dimensions: | 9” W × 15” H × 20” D (229mm × 381mm × 508mm) |
| Weight: | 35 lb (16 kg) |
Testing/Monitoring
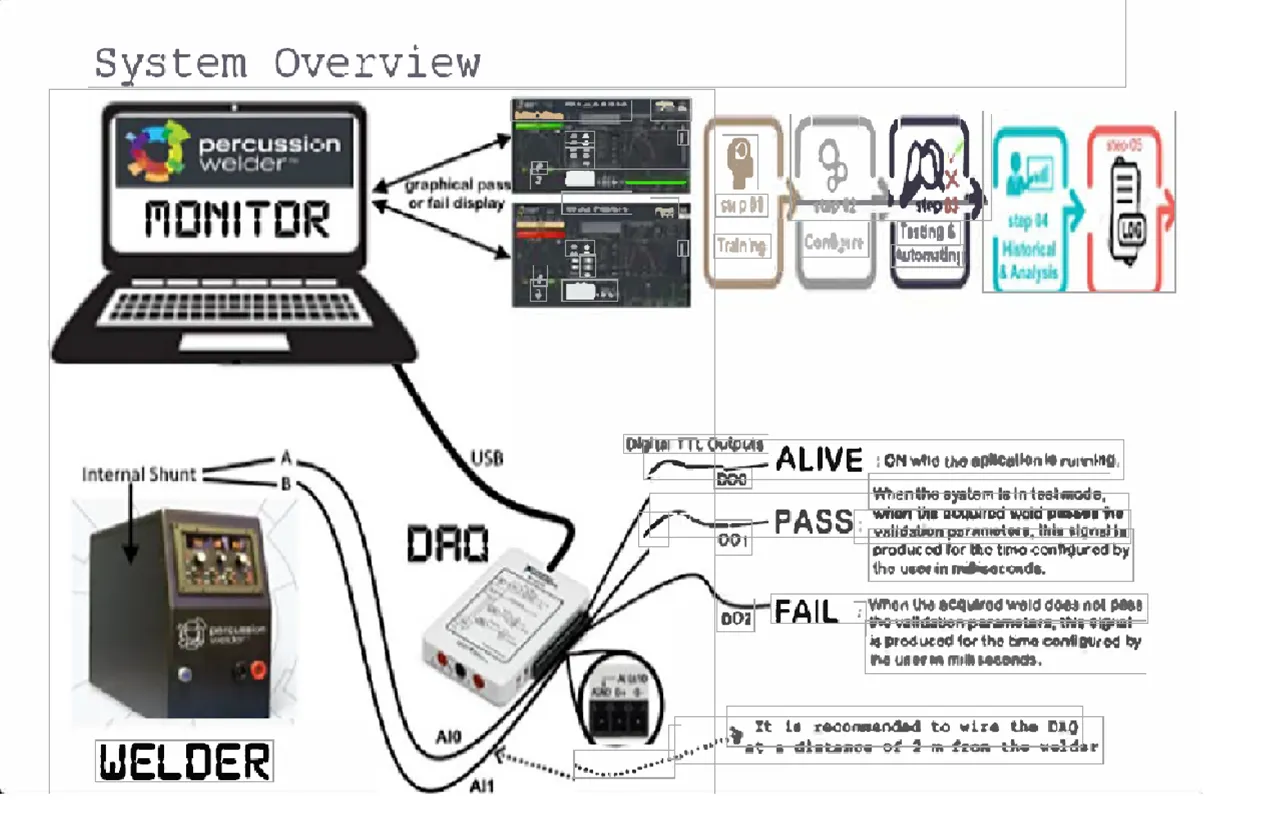
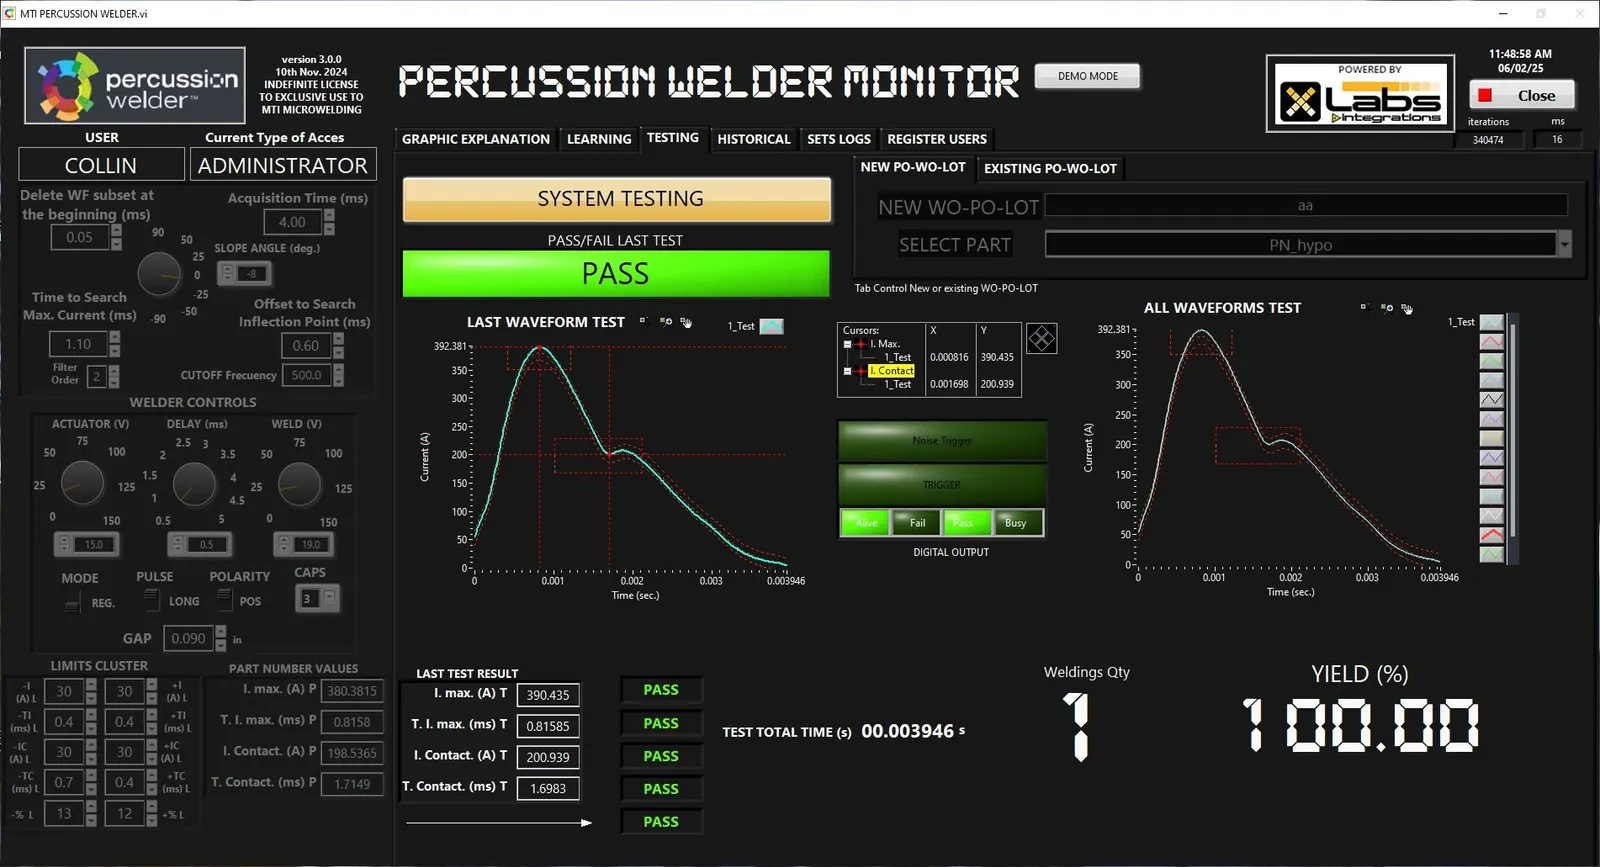
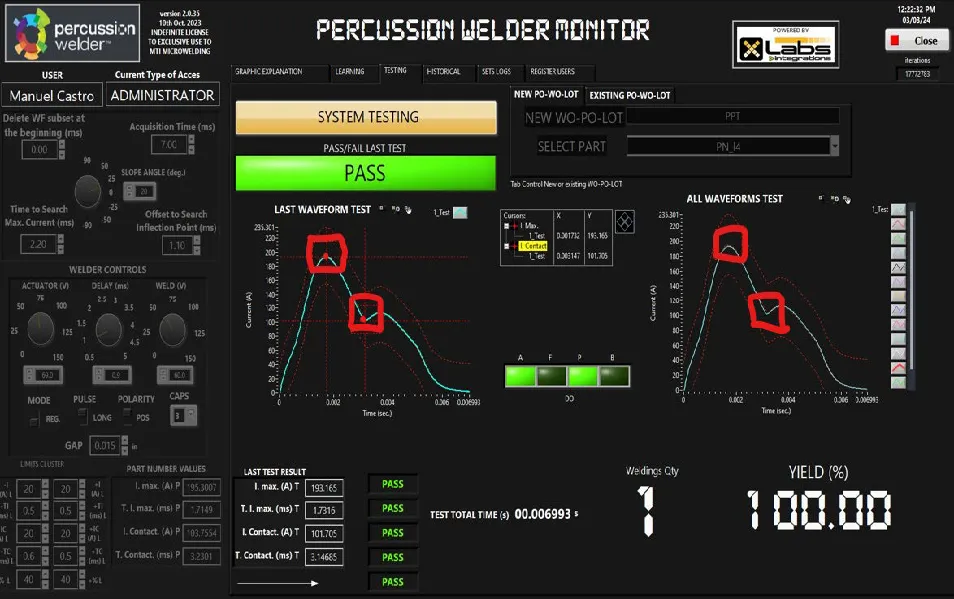
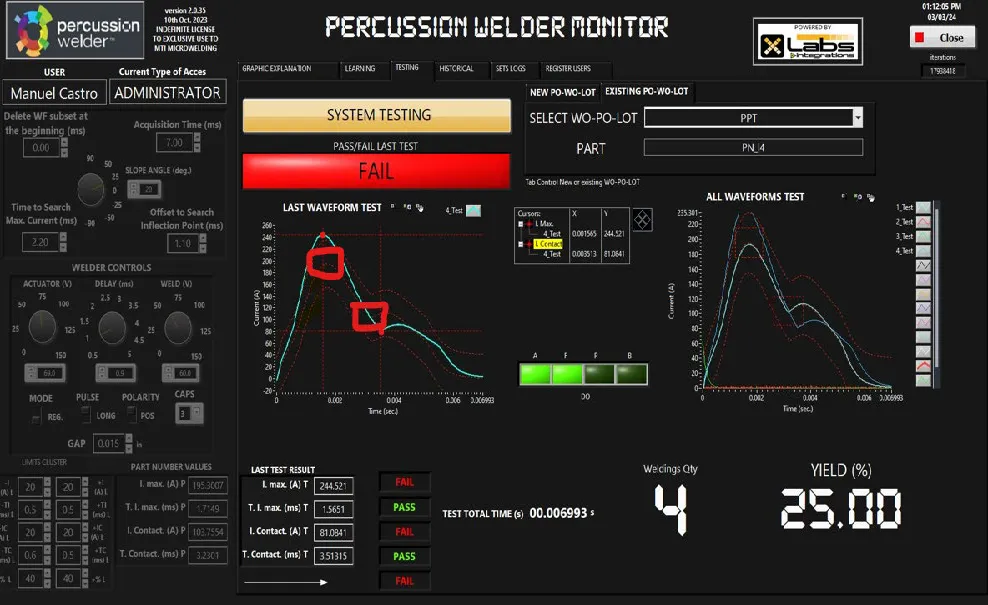
If any of the 3 weld characteristics fail, the system will display a Fail screen and output a fail signal on the weld monitor so that you can verify further information
In the Test section, the system uses the pattern selected in the configuration section to compare to subsequent welds. If the welds are within the parameters set for maximum current, inflection, or contact point, and waveform the system will deliver a Pass screen and generate an SVDC digital output signal to monitors and weld analyzers.
Chapter 02 / 02
Operation So Simple And Intuitive, We Can Show You How To Use it.
If you’re like us, sometimes a picture (or video) is worth a thousand words. Watch our video showing you step-by-step how easy Percussion Welder 726 Bench fixture is to operate.

Gallery
Inside the monitor
Screens and diagrams from the software.

Where to next
858 Percussion Welder
The 858 Percussion Welder Front panel makes micro-welding simple with the advanced features any type of micro welding is possible. Call us on 303-536-7838 for more details.
Open →726 Bench Fixture
The 726 Bench Fixture is the “weld head” of the MTI Percussion Welder system. When combined with the Model 858 Percussion Welder the system provides everything required for producing consistent, reliable weld joints. Call us on 303-536-7838 for more details.
Open →Products
At Percussion Welder, we offer a complete Percussion Welding System to our customer base at MTI MicroWelding to assist with your microjoining needs, including the 858 Percussion Welder, the Percussion Weld Monitor, and the Model 726 Bench Fixture.
Open →Process Development
If you have a project that requires a unique or intricate micro welding solution, contact us and we will evaluate the application with you. Call us on 303-536-7838 for more details.
Open →FAQ
What does the Percussion Weld Monitor do?
It provides waveform analysis to help develop weld settings, defines a signature waveform for a given product, evaluates production welds, and collects data to meet your QC requirements.
What does it measure on each weld?
Three characteristics of the weld energy output: maximum amplitude (maximum current), point of contact or inflection, and the waveform itself.
How do I set it up?
Three stages. In Learning you make welds to create the signature waveform and set the search area for each characteristic. In Configuration you select the pattern for testing and adjust the search areas. In Test, each weld is compared to that pattern.
What happens when a weld fails?
If any of the three characteristics fails, the monitor shows a Fail screen and outputs a fail signal so you can check further.
Can I connect it to alarms or automation?
Yes. In Configuration you set how long the pass or fail digital output signals last, for alarms or automation. A pass produces a digital output signal to monitors and weld analyzers.
Where can I get the full manual?
Follow the key steps for setting up and monitoring your welds, or contact us at 303-536-7838 for the entire operating manual.
Still have a question? Tell us your weld challenge and an engineer will reply.
Start here
Talk to us about adding the Weld Monitor to your 858 system.
Prefer to talk? Book a demo or call 303-536-7838